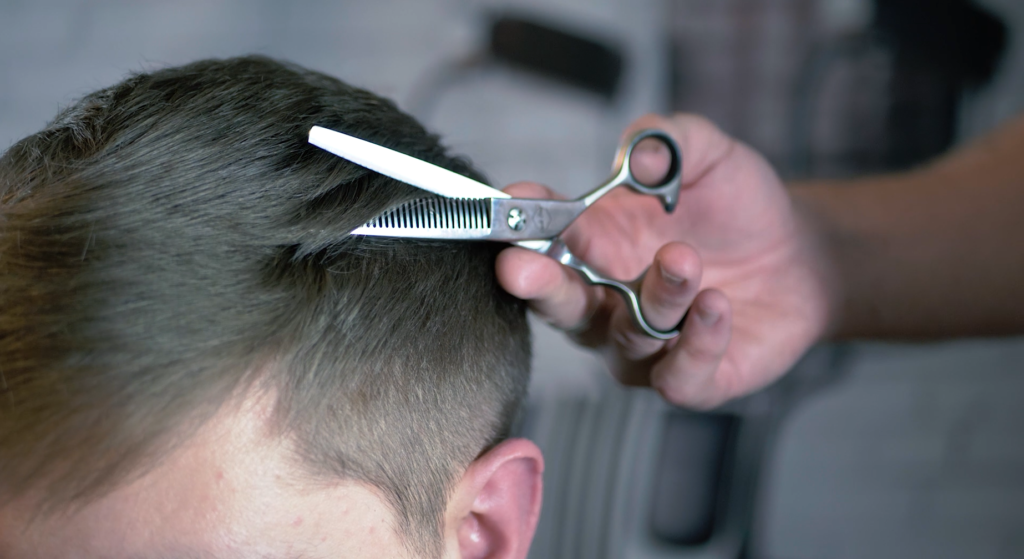
Texturising Hair With a Thinning Scissor
It’s a controversial topic, but we support both sides so we have to feature it: texturising hair with a thinning scissor (keep the hissing down a bit!). Texturising with a thinning scissor obviously creates texture, but it also removes excess weight! As little or as much as the customer wants. Thinning scissors may be a controversial tool, and quite unjustly in our opinion, but there’s no denying their place in the barbershop!
When to texturise
Your customer comes in with medium-length thick hair, all the same length and tells you he/she wants a quiff or pompadour. That’s about half an hour of thinning and texturising on your hands, PLUS actual cutting and styling. Or, 10 minutes with a pair of thinners, like the DS+ Offset Thinning Scissors. There’s no denying that these are a major time-savers, so it’s best to know how to use em!
These shears are specifically designed for thinning, with notches built into one side and the other side left smooth and razor sharp. These notches, or teeth, allow the barber to remove less hair with each snip than they would with regular scissors. The positioning and angle of the scissors can be used to texturise hair as needed, to provide a more manicured and well-groomed style. Snipping the ends can allow the barber to soften and blend, while pointing the thinning scissors into the mid length of the hair can reduce bulk.
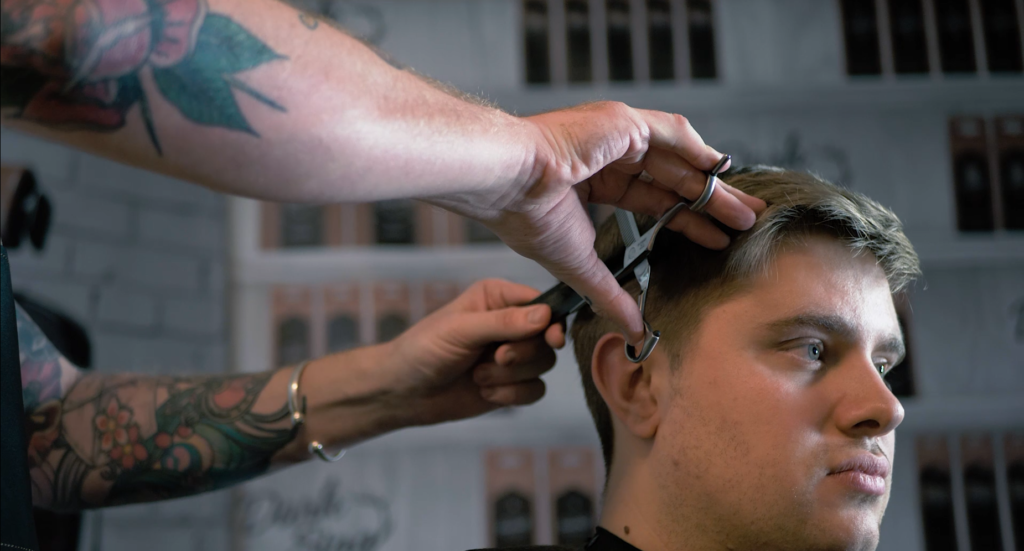
Texturising bulky ends
One possible use of thinning scissors is to add texture and shape to bulky, blocky ends. After sectioning the hair, take one section at a time and pull it away from the body or face. Hold the ends of the hair in between your fingers, using the other hand to take the thinning scissors. Apply them horizontally against the ends of the hair. The hair can be cut slightly inward from the outer corner, thinning and shaping the ends as needed. Keep applying this to all of the other sections until it has all been thinned and texturised. Cut an inch at a time from the outer corner.
Thinning out hair
To thin out the hair, use in much wider sections of the hair, rather than just the ends. This can be useful for thinning out a thick or unruly hair style, giving it a more defined shape. To accomplish this, hair is once again separated into sections. If working with long or thick hair, hair clips can be used. Working with one section at a time, the barber can use a comb to hold the hair steady and work through it while weight and volume is removed with the thinning scissors.
As the barber holds each section of hair, the thinning shears can be pointed with the tip towards the ceiling, cutting the hair about mid-way up each section. The same section can then be cut with the tip facing downwards. By alternating angles with the upward and downward motion of the thinning scissors, the hair can be thinned with a natural regularity. Comb through the hair after completing each section to see if the desired texturising effect has been achieved, repeating if necessary.